Shader Khas Furality Somna
Apa itu shader?
The Furality Somna Shader is a PBR shader. This means it uses "Physically Based Rendering". Or more simply put, realistic lighting. The shader has some special effects such as Starshine and Dreamweave, as well as Furality's Luma Glow system. Luma Glow allows our club world to connect to your avatar and display hand-authored effects in your emissions. This lets you really become part of the show!
Luma Glow vs. AudioLink - Apa bedanya?
Luma Glow adalah pertunjukan cahaya yang seluruhnya diprogram oleh tim AV kami sesuai dengan musik dan pencahayaan di Klub F.Y.N.N. selama kovensi Furality.
AudioLink adalah efek yang dibuat dari audio yang masuk dan dianalisa langsung.
Cara menerapkan shader
Dengan skenario contoh - Direkomendasikan untuk pengguna baru
- In Packages -> Furality Somna Shader -> Examples -> Scene, Open the "Somna Material Examples" scene to view examples of the shader pre-applied
- Import your avatar into the scene
- Click on an example material sphere
- In the inspector, find the material slot and click it
- The file explorer will now show the materials within the scene
- Duplicate the example material of your choice (Ctrl + D)
- Drag it onto your avatar
- Apply your textures and adjust properties as needed
Dengan material contoh - Direkomendasikan untuk pengguna baru
- Buat scene baru di Unity
- Impor avatarmu ke scene tersebut
- Cari bagian "Packages -> Furality Somna Shader -> Examples -> Materials"
- Kopi salah satu material contoh (Ctrl + D)
- Arahkan material yang sudah kamu duplikat ke avatarmu
- Aplikasikan tekstur yang kamu inginkan dan atur konfigurasi shader sesuai kebutuhanmu
Dengan material baru
- Buat scene baru di Unity
- Impor avatarmu ke scene tersebut
- Klik kanan di bagian "file explorer" di Unity
- Klik "Create"
- Pilih bagian "Material"
- Namai material baru tersebut sesuai keinginanmu
- Klik material yang sudah kamu buat untuk membuka material tersebut di inspektor
- Cari menu "shader" di
- Pilih "Furality" dari menu shader
- Pilih "Furality" dari menu shader
- Pilih shader Somna (Somna Shader) dari submenu Furality
- Geser material dengan shader Furality ke avatarmu
- Aplikasikan tekstur dan atur konfigurasi tekstur sesuai kebutuhanmu
Dengan material yang sudah ada
- Buat scene baru di Unity
- Impor avatarmu ke scene tersebut
- Pilih material yang ingin kamu gunakan untuk membuka materi tersebut di bagian inspektor
- Pilih "Furality" dari menu shader
- Pilih shader Somna (Somna Shader) dari submenu Furality
- Geser material dengan shader Furality ke avatarmu
- Aplikasikan tekstur dan atur konfigurasi tekstur sesuai kebutuhanmu
Pemilih Alur Kerja (Workflow Selector)
The Furality Somna Shader features a new menu that allows you to select your texture workflow. This is useful for avatar creators and texture artists as it allows arbitrary channel packing. Utilizing this feature fully can allow for major savings to VRAM.
Alur Kerja (Workflow)
Metalik - Inilah alur kerja default Unity untuk shader standar.
- Metalik (Peta Mask 01)
- R - Metallic
- G - Unused
- B - Unused
- A - Gloss
- Occlusion (Peta Mask 02)
- R - Occlusion
- G - Occlusion
- B - Unused
- A - Unused
Efek Spekular - Alur kerja yang memakai peta tekstur tambahan untuk warna spekular, bukan materi metalik.
- Spekular (Peta Mask 01)
- RGB - Warna Spekular
- A - Kilauan (Gloss)
- Occlusion (Peta Mask 02)
- R - Occlusion
- G - Occlusion
- B - Unused
- A - Unused
Packed - Alur kerja dengan pemilihan channel acak. Paling multiguna. Bisa digunakan di peta tekstur apapun, namun perlu diatur dengan seksama.
Cara menggunakan Pendaran Luma (Luma Glow)
Luma Glow - Sederhana
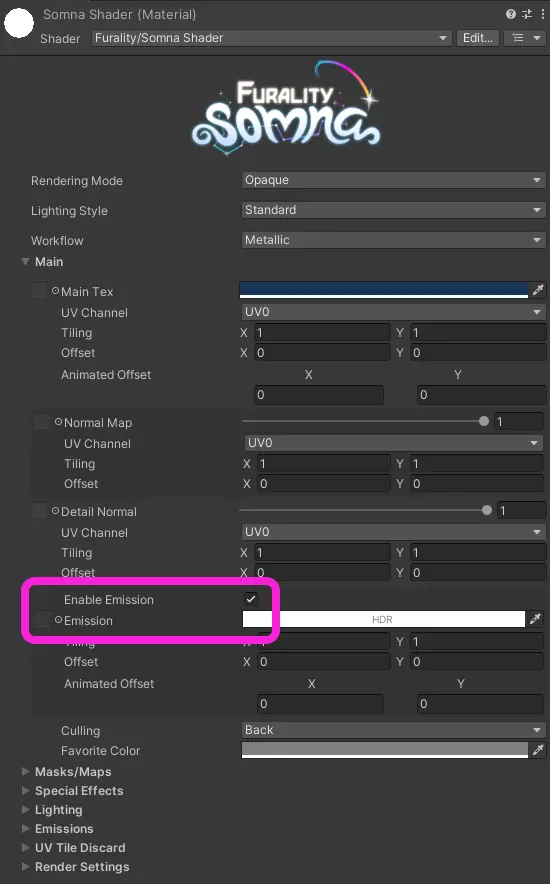
The simplest way to use Luma Glow is by using your emission. Drag your emission texture into the little square next to "Emission" or click the small circle to open a texture browser. After that, check the "Enable Emission" checkbox and make sure the color that is marked "HDR" is set to white so your emissions show.
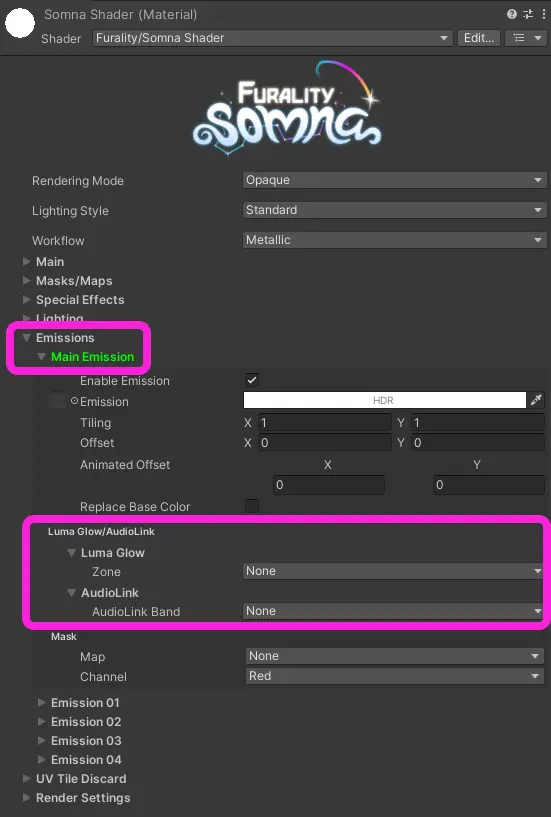
Sekarang, buka menu Luma Glow/AudioLink. Selanjutnya, buka menu "Emission Glow". Disini, kamu bisa memilih salah satu zona Pendaran Luma (Luma Glow) dari daftar yang tersedia.
Luma Glow zones are entirely aesthetic. It doesn't matter which one you pick! The zones are there so you may coordinate with friends and have all of your effects match up. Or maybe your avatar has multiple materials, and you'd like to vary the effects a little bit on each one. That's what these are for!
Efek Gradien Luma Glow bersifat mirip seperti zona tapi mendukung pola yang lebih kompleks lagi. Walaupun begitu, Gradien ini mungkin memerlukan pengaturan tambahan untuk avatar tertentu jika efek ini dipakai di bagian yang melewati sambungan UV (UV seam).
Setelah kamu memilih zona tertentu, kamu sudah selesai! Kamu bisa memasuki dunia tes Shader Somna dan meninjau penampilan avatarmu! Jika kamu menghadapi masalah, mintalah bantuan di channel #shader-help di Discord kami.
Pendaran Luma - Advanced
Luma Glow has a lot of customizability, but using the shader to its fullest extent can seem a bit daunting. Hopefully, this clears things up!
Peta Mask (Mask Maps)
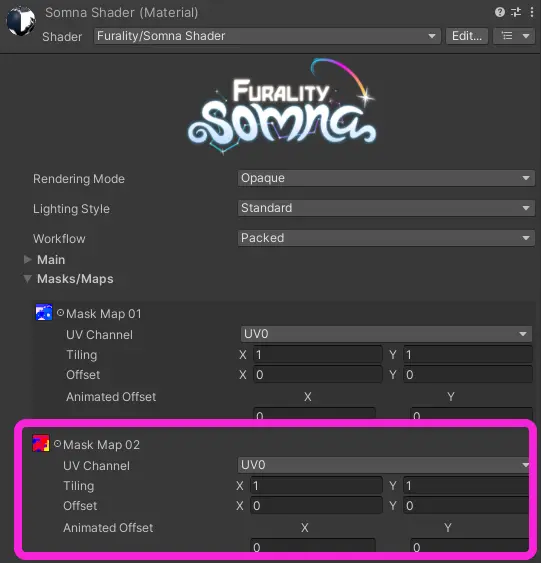
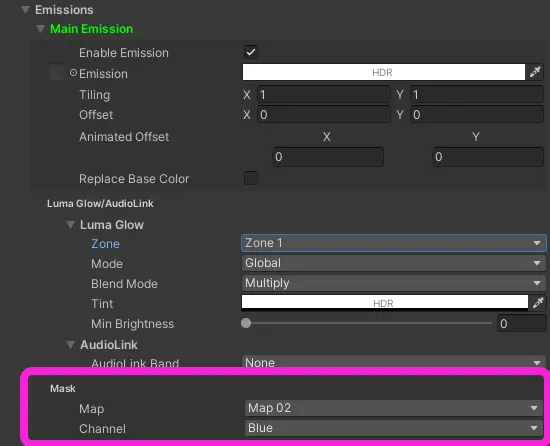
Mask maps can be used to add even more complexity to the way your avatar reacts to Luma Glow. Using mask maps in conjunction with your emission allows for up to 5 separate zones or gradients to be mapped onto your avatar! To use one for Luma Glow, just specify a mask and a color channel.
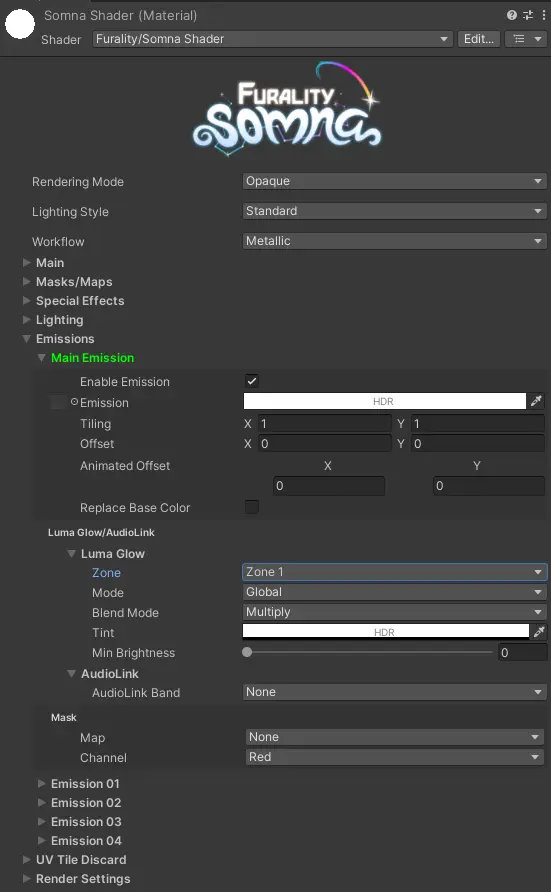
Apa yang bagian "Mode" lakukan?
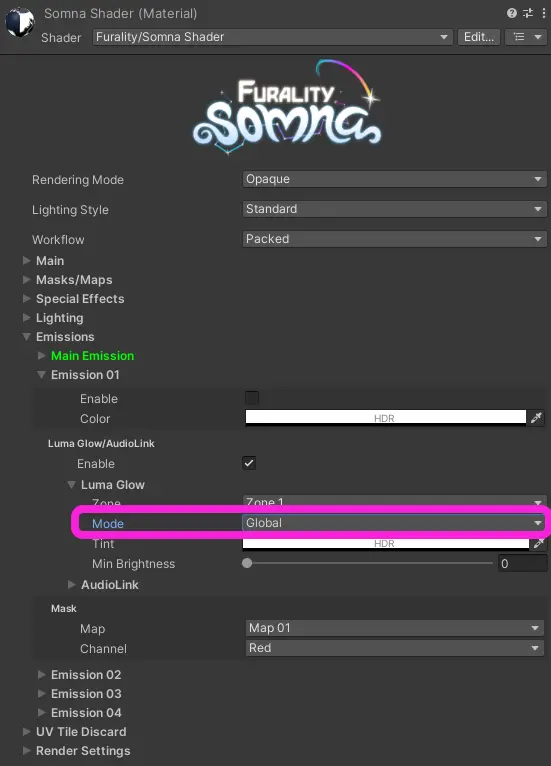
- Global - Luma Glow will affect your entire mesh at once
- Pulse - A directional wave across your mesh's UVs
- Radial - Similar to pulse but is in the shape of a circle and radiates out from its center
- Direction Map - Uses a grayscale gradient texture to map the effect
- Reversed Direction Map - Inverts the direction defined by the direction map
Efek Spesial
We've provided some unique, beautiful effects to enhance your look while attending Furality Somna: glistening shine, sparkling stars, cozy patterns and gradients, and more! All effects can be masked using Mask Maps, just like your emissions and Luma Glow, as noted earlier.
Starshine
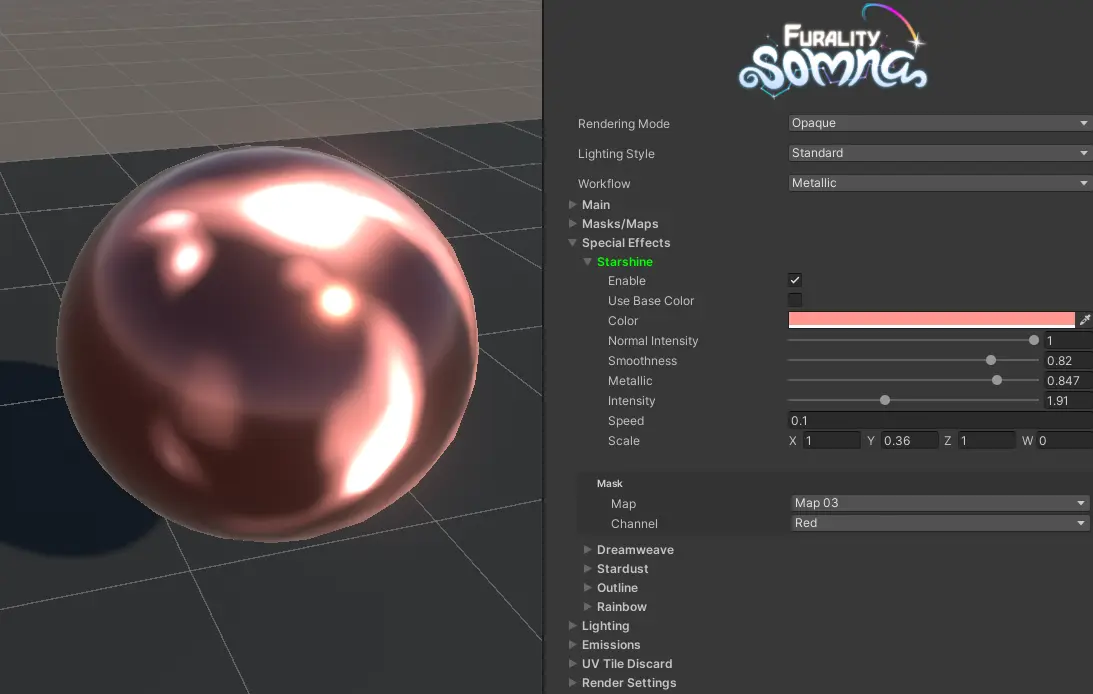
Efek Starshine memberikan efek metalik yang berpendar lembut.
Dreamweave
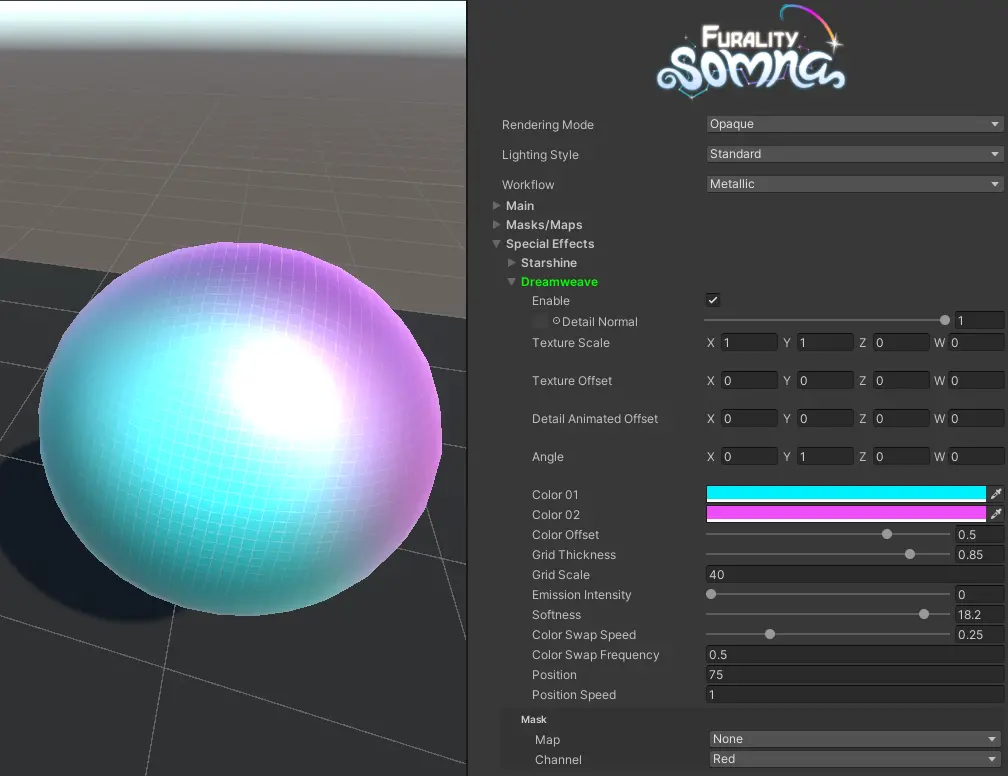
Efek Dreamweave termasuk grid yang bisa kamu kustomisasi dengan efek gerakan spesial saat berada di dalam VRChat, dan gradien yang perlahan berganti warna sesuai pengaturanmu.
Debu Bintang (Stardust)
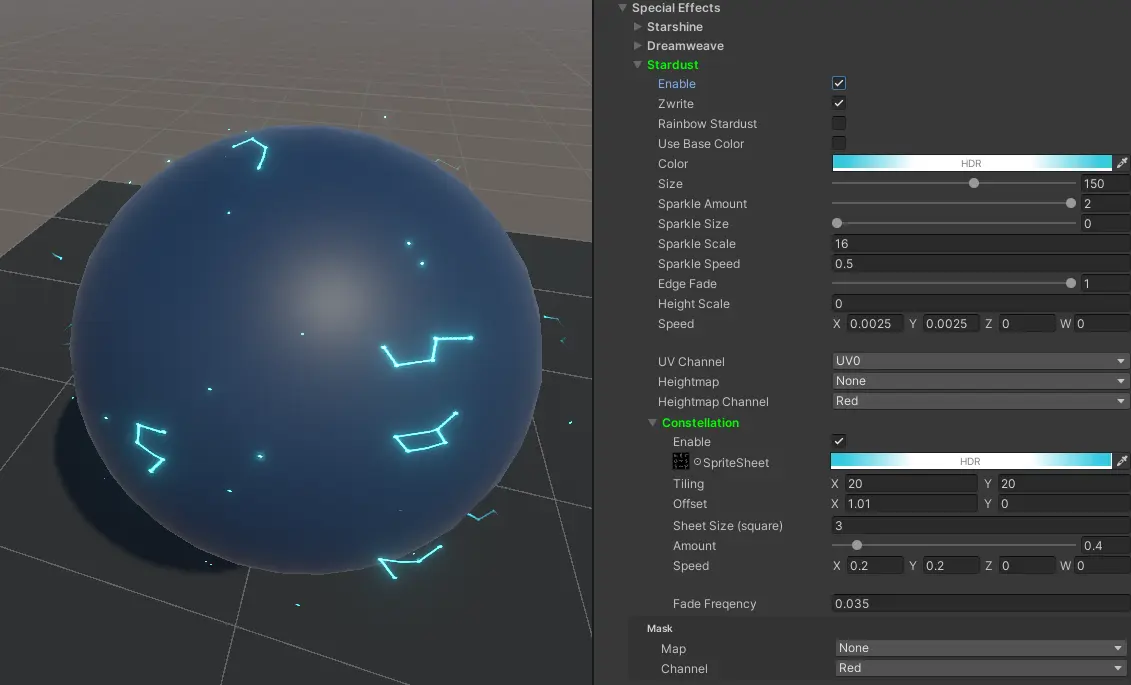
The Stardust effect allows you to add some celestial sparkle! Glittering stars hover around you, twinkling in and out of existence. You can also optionally enable the Constellation effect within Stardust, which uses a grid-based image to allow for randomized constellation shapes to fade in and out alongside the stardust.
Outline
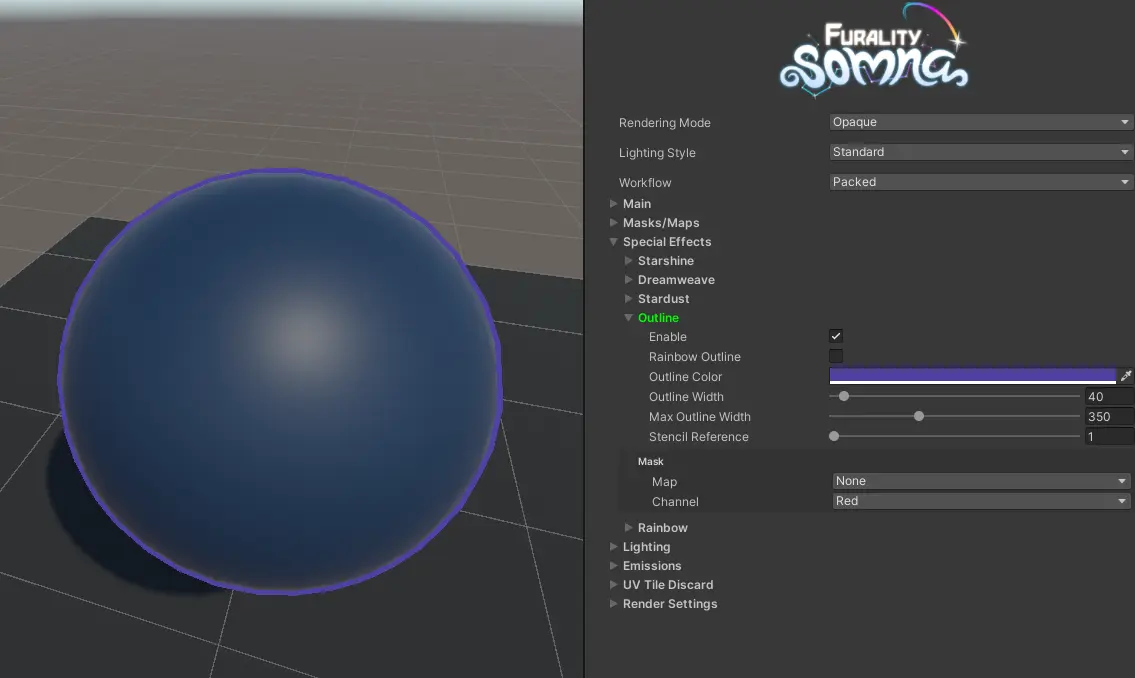
The Outline effect renders an outline around the object the material is applied to.
Pelangi
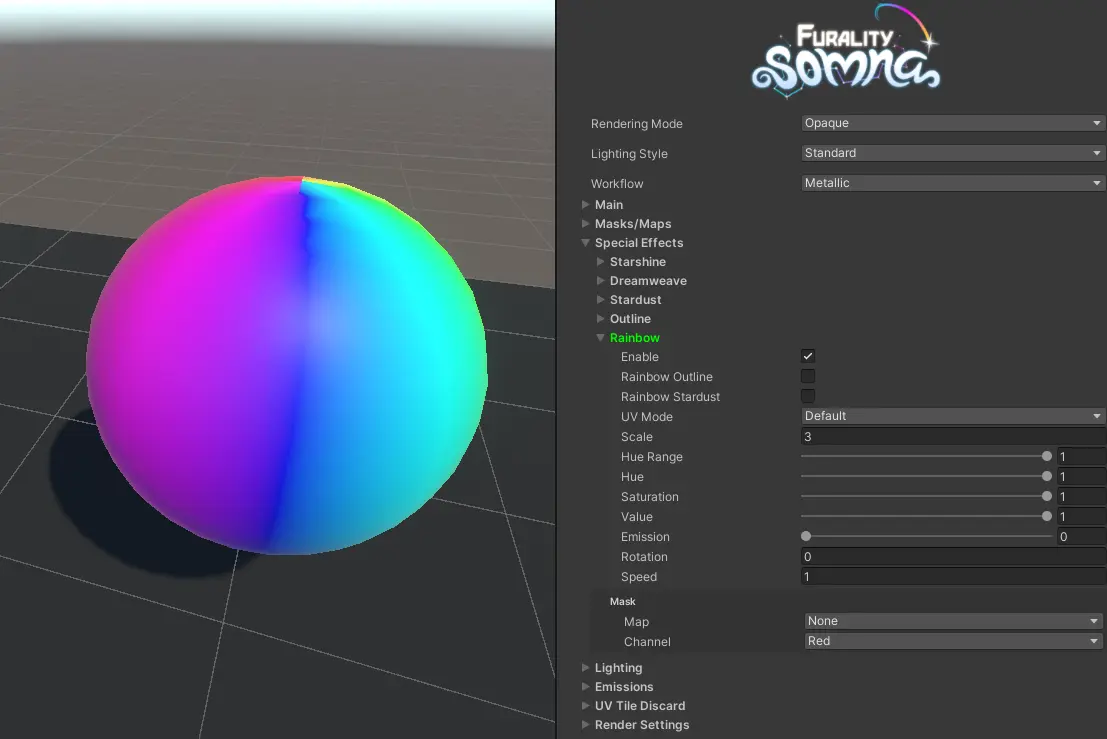
The Rainbow effect applies a scrolling rainbow to the avatar. This also allows you to enable Rainbow Outline and Rainbow Stardust effects, which can be further customized within their respective sections.
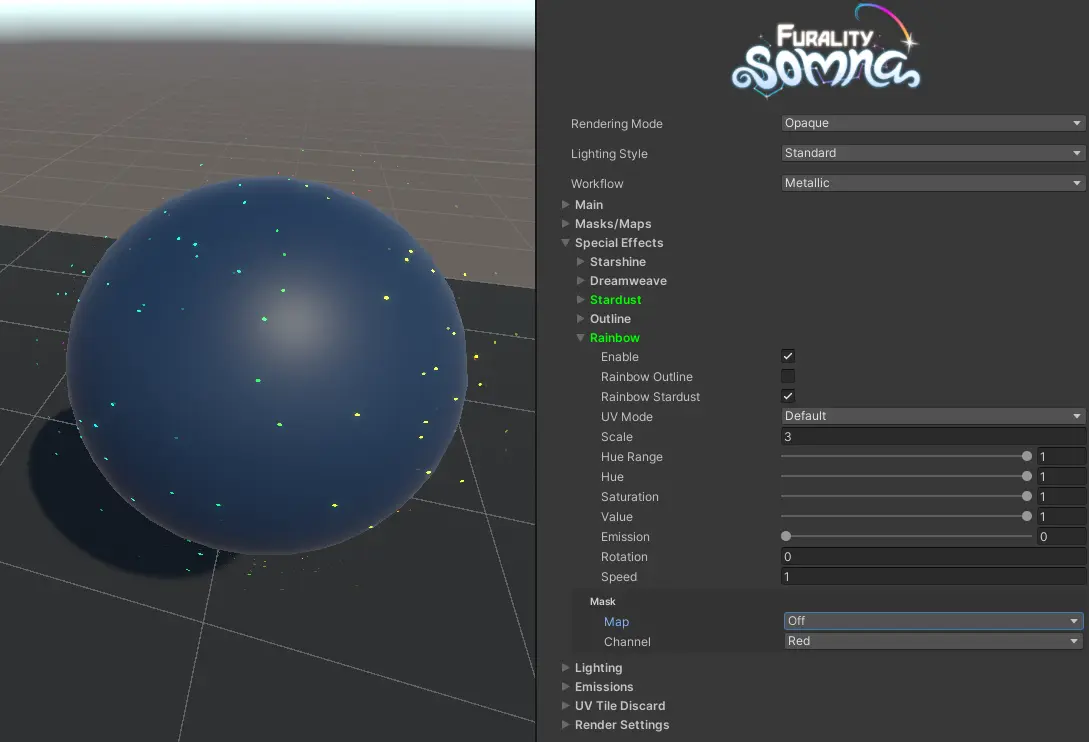
Jika kamu ingin mengaplikasikan efek Pelangi hanyak ke Outline dan/atau Stardust, ganti bagian "Mask -> Map" di bagian Pelangi ke "Off" (Mati)
Perlu bantuan mengenai shader Furality Somna?
Jika kamu memiliki pertanyaan atau memerlukan bantuan dengan shader Furality Somna, kamu bisa menanyakan pertanyaanmu di channel #shader-help di server Discord resmi Furality!
Kredit
Shader dibuat oleh Naito Ookami